Wednesday, May 26, 2010

Collaboration Work In Progress


I'm pleased to tell you I have three more follow-up interviews coming in the Collaboration series.  While those are percolating, I thought I'd attempt my first "work in progress" posting.  I love it when artists post these and I am woefully bad at doing it myself.  When I'm caught in the frenzy of making something, I rarely stop to get out the camera and take pictures.  

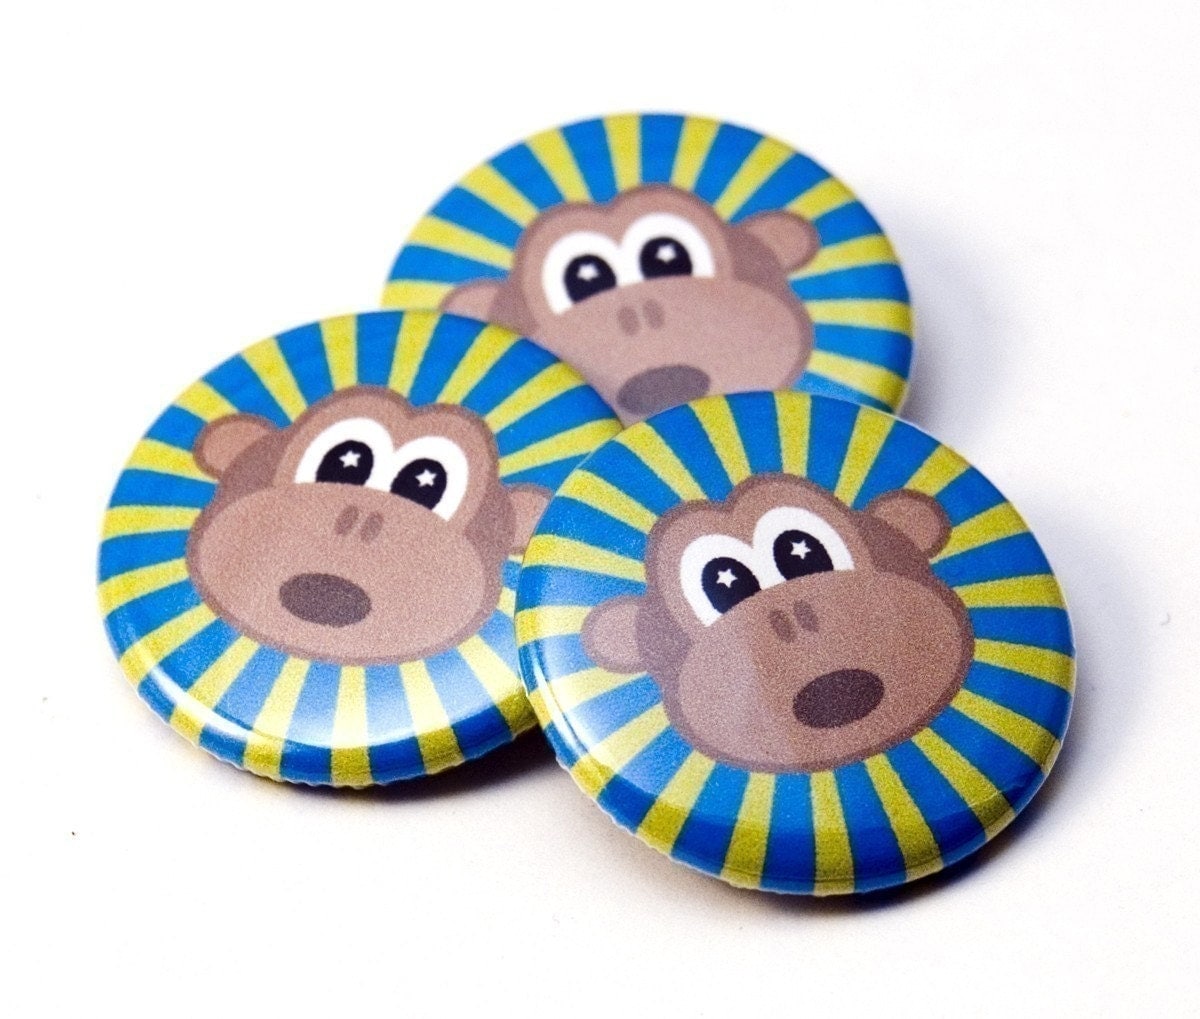
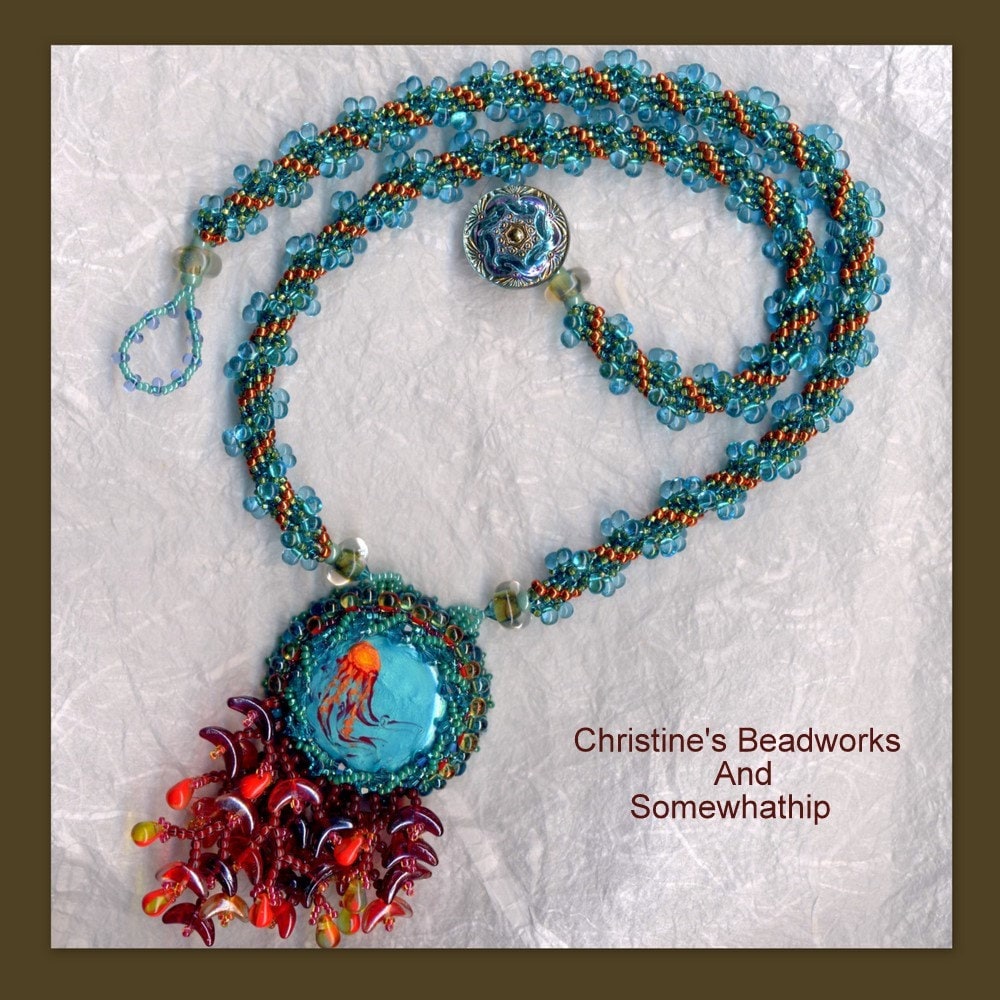
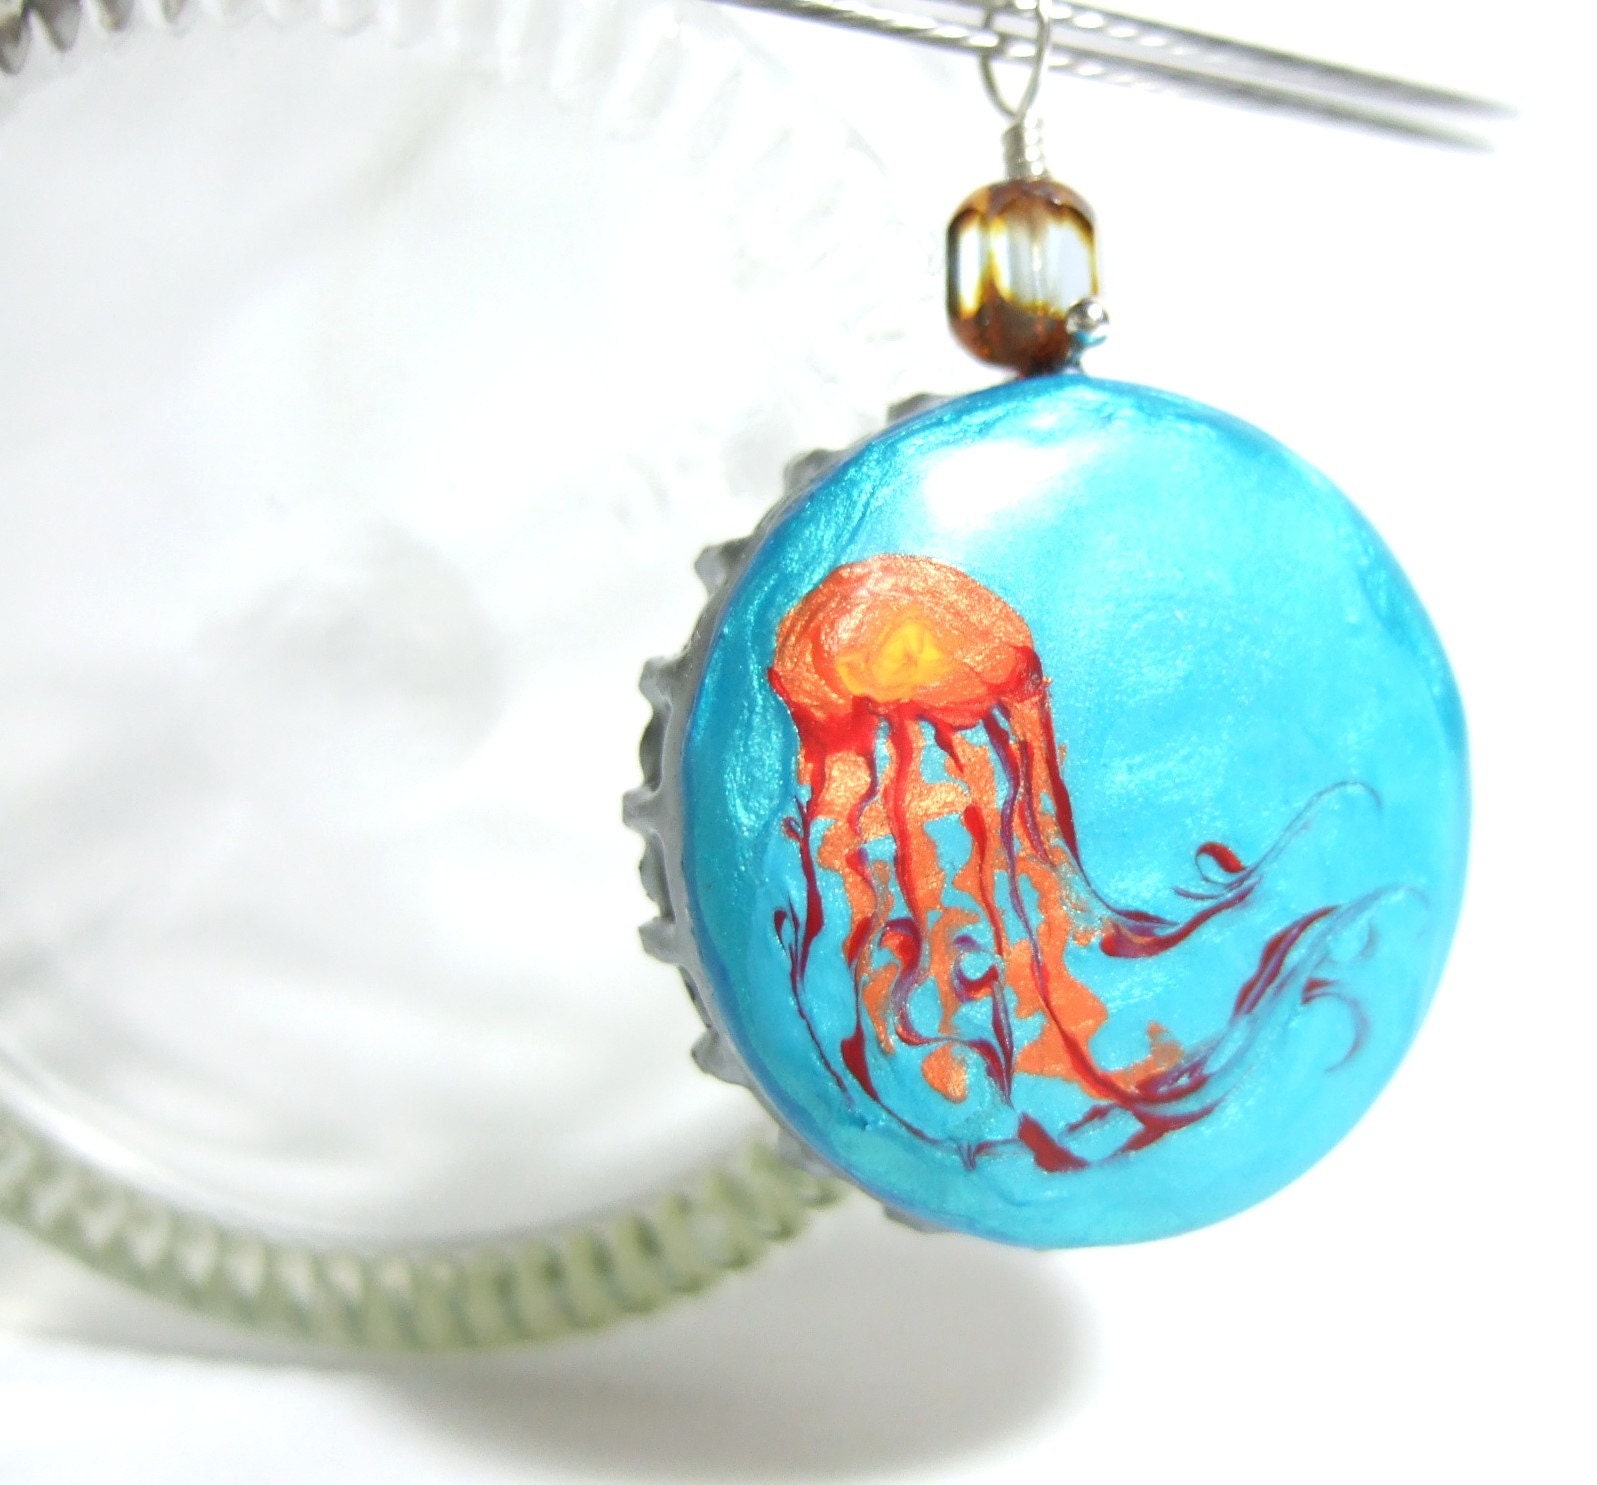
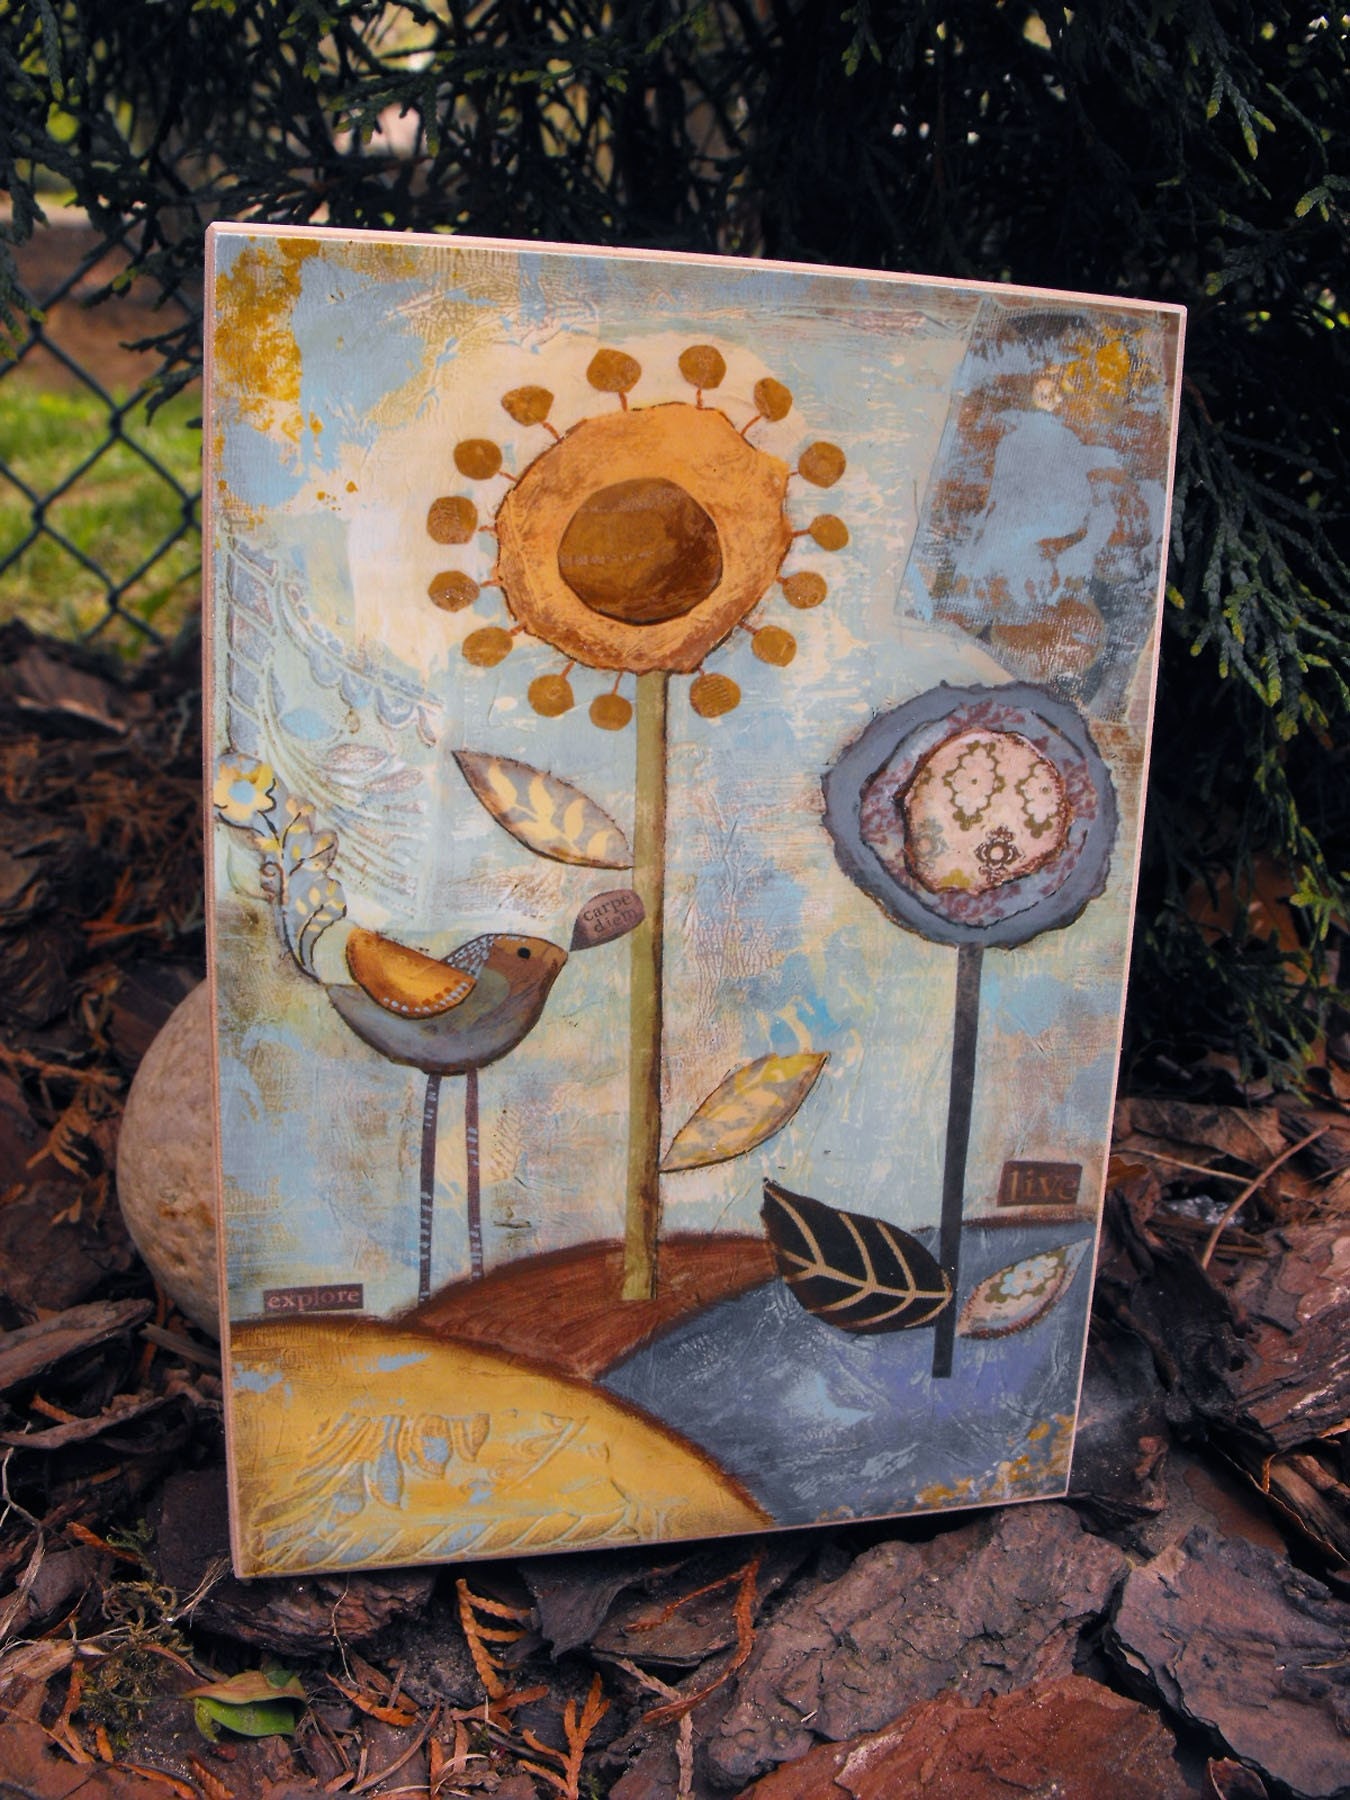
What better place to start, than with my collaboration with Jill, from Barrel of Monkeys.  My inspiration for approaching Jill for permission to use one of her buttons in my design actually came from my Mother-in-Law, Judy.  Judy (and her husband Earl) is one of my main sources for bottle caps and one day she handed me these three pins from Bell's Brewery knowing my love for reusing stuff.

I have a project planned for these jewels, but my Collaboration series sidetracked me for the moment.  I had purchased several of Jill's pins in the past for gifts and couldn't resist using one in my first design.  They are the perfect shape for using as a cabochon with no additional prep work needed.  The only thing I did was remove the pin finding from the back.  (Note:  If this had been an antique pin, I'd have made a pendant instead and would have kept the pin in place so as not to destroy it's value).

Although it was screaming to be a pendant, I decided I'd made enough of those recently and I screamed back, you are a cuff, you are a cuff.  I like to try new techniques so rather than a brass cuff, I'm going for a softer foundation.  I found a fusible Peltex at Joann Fabrics that has the right weight to it (Note:  you can get this as fusible on both sides, one side, or nonfusible).  There are many materials you can use as a foundation for bead embroidery which may be a good series for another post (always thinking ahead).
 
There are several methods you can use with bead embroidery, you can bead as you go, draw out your design first, or do as I did here and find a fabric that coordinates with your design.  The advantage of this method is that it gives me some design lines I can follow (or not) and the color will show through any gaps in the beading.  (Note, I strongly advise dying your foundation or using a color that will blend with your embroidery, I really dislike seeing the white foundation in this type of work).


To prep the piece, I first ironed the fabric to the fusible side of the Peltex and then glued the button to the center.  Allow it to dry for several hours.    


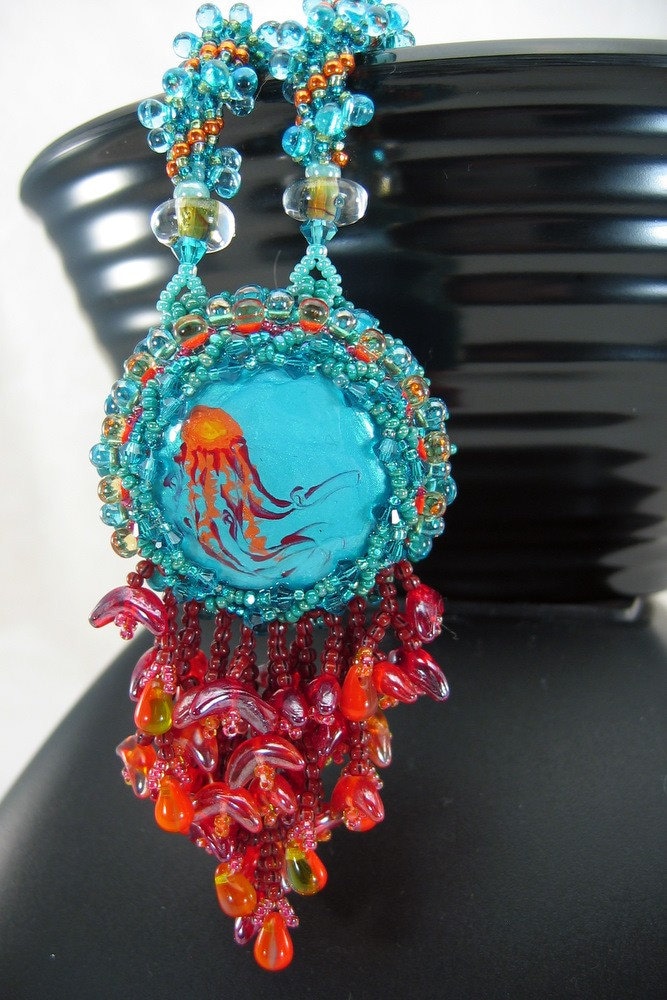
The next step is bezeling the centerpiece.  This is both decorative and functional as it holds the button securely in place (never rely on glue alone).  Usually I would embellished the bezel next, but I learned from experience that I need to do the surrounding beading first so whatever embellishment I choose doesn't get in the way (plus I haven't decided yet what to do).


The last step is a decorative surround which can also be used as a foundation for further embellishment or left alone.  You can also see I've added guide lines, this keeps me from stitching too close to the edge, I'll need some room for attaching a backing.


The easy part is done and now I'm stuck.  My original thought was corkscrew fringe all around the bezel, however, that may be too wild and too delicate for a cuff.  I need to decide whether I'm going to follow the lines of the fabric, whether I'm going to add other stones, and what I'm going to do as a closure.  My first instinct is not to include other stones or keep them to a minimum and focus instead on creating patterns and textures with seed beads.  I'm really going to try not to embellish the focal point until the end (embellishing is my favorite thing, but I need restraint here). 


I'll do my best to take pictures at each step that I can share with you as I finish this piece.  As always, your suggestions and comments are most welcome.

Saturday, May 22, 2010

Featuring LilaRubyKing and Artmind


Today, I'm excited to present the collaboration between Anna's shop, Lilarubyking, and Misty's, ArtmindI came across both of these artists while searching Etsy for collaborations.  The following interview is from a press release prepared by Misty for just such an occasion.  Not only will you learn a bit about how their relationship began, it may just send you out to form your own.  Their story is inspirational and demonstrates that there are no limits if you are willing to explore the possibilities. 


Around the middle of 2009 I was thinking how much I would like to have a go making jewelery using porcelain which I had just begun experimenting with. I had no idea where to start and thought I would ask my friend and jewelery designer, Anna from LilaRubyKing if she would possibly, maybe, perhaps, one day be interested in collaborating with me. Anna and I had become Etsy friends through the European Street Team, and many conversations discussing printed envelopes, our mutual affection for crackle glaze, and trying to work out if our paths ever crossed in Perth in 2001.  Anna was super keen and the planning began!


Interesting fact: Anna lives in Greece and I live in Belgium. We have never actually met but are living proof that collaborating over the internet is as easy as living next door. It feels like you have  a co-worker even though you never actually see each other. It's great to exchanges ideas and to inspire each other.

It started off in a chat room on Etsy. Anna made some visual aids.  Soon ideas began to flow.  We decided to keep our collaboration secret and I started referring to it as ‘the secret project on my blog’.  I started making samples in my studio, showed pictures and shared processes in my blog.   It was a way for us to work out ideas while trying to pique people’s interest. And it was great to see people were intrigued by the all that we showed, giving us great feedback. Since we both love textures and nature, it showed in the prototypes.
After a few months and trying out some bits and bobs on both sides, we set a date on which we would list our first items. The balance of who does what was never really a subject.  Anna takes the pictures, lists, wraps and ships the items. I take care of promotion, writing about the collaboration in my blog, and sending off the occasional blog submission.

All in all, we ‘met’ twice in a chatroom and chat via e-mail every day.  Exchanging ideas, blabbering about our cats and partners or doing more serious stuff like discussing pricing. We calculate our price based on time, material and artist value and we each get our share of that. Very fair!  It's a collaboration based on respect for each others work and for our friendship that developed throughout. 

 
Exchanging ideas is super exciting and gives you a boost. It’s like wanting to dig into the clay right away or putting together jewelery when the mailman brings a box of goodies. Anna comes up with the most unusual ideas and makes me do stuff that I hate, like molding Barbie hands (not again!) but that makes it all fab and fun. The advantage for both of us is that it doesn’t feel like you’re working on an island. It generates energy and makes you try things that you never thought off before.  It’s opening up new doors to new adventures and it’s all super exciting.  The combination of porcelain and silver is not shocking or new but putting ideas on each other’s plate is a challenge.

I'm honored that you've taken this journey with me.  In the upcoming weeks I'll bring you more features as we continue to explore this series.  If you'd like to learn more about Anna, Misty or the European street team, please visit their links below:

ArtMind Blog
ArtMind Shop 
Lilarubyking Shop
European Street Team

Monday, May 17, 2010

Collaborations Part III

 
I had tremendous fun hunting examples of collaborations and knew I'd have just as much fun creating a couple of my own.  While working on my bottle cap series, I fell in love with the miniature paintings Karyn, Somewhathip, created on her bottle caps and knew they'd be the perfect first venture to combine talents.  I contacted her for permission to utilize her cap in my own creation and then bought two of her pendants in my favorite design, the Jellyfish.


What I most appreciate about Karyn's work, besides the gorgeous artwork, is you can tell it's a bottle cap.  Although my designs preserve the cap's graphic artwork, you can't readily tell it's made from a cap.  I hesitated before beading around the image and taking that aspect away from her pendant.  However, I decided to take the plunge and focus on the painting and not the bottle cap.


Painting and drawing are talents I truly wish I had.  I can paint the Donna Dewberry one-stroke method (she can teach anyone to paint with the right brushes).  However, this is a technique not true artistry in my incapable hands (although I did create very cute paintings in my daughters bedroom thanks to Donna).  I'm not any better at graphic design or collage work.  I lack the depth perception, color vision, or art gene that it takes to make something beautiful in these areas.  


Karyn's artwork was a perfect match.  She utilizes bottle caps, my favorite "cabochon", and her paintings are vibrantly beautiful and could hold their own with the beading.  I wanted to experiment with fringe and decided to mimic the jellyfish tentacles.  I found the perfect german glass beads on Laura McCabe's ebay store, highendbeads, in half moon shapes in oranges and red.  These were added the the bottom of the branch fringe along with Japanese drops for additional color.  I also included Japanese drops around the perimeter of the cap to fill in the fullness created by the cap's depth.  In my own designs I usually flatten the cap first for a more narrow profile.  The thicker profile created a bit of a challenge as I was at risk of overpowering the painting but needed to fill in the area.

The result was highly dramatic and it needed a necklace strap that was bold, but would also pull back a bit so that the painting did not become lost.  (A danger in beadwork is to add too much to the design).  I went back to my favorite rope, the spiral, and added a second row of embellishment to create fullness.  The result, I believe, is beautiful and pulls the predominant blue of Karyn's design back into the design.  

I have a couple of other ventures in the pipeline.  The first utilizes a graphic button from one of my favorite button artists, Jill from Barrel of Monkeys.  I've purchased several of her buttons as gifts and own several others from my travels.  I think this button will be my first one, it's her signature design and I can envision something wonderful for it.  This collaboration combines my love for using found objects (who doesn't own a button), buying local, and combining skills.
Stay tuned for some follow-up interviews and notes from my most recent classes (just have to finish the projects first).  I leave you for now with a Jellyfish treasury to enjoy.  When I release a new design, I often create a treasury based on the same theme.  I'm proud to say that this was chosen to appear on Etsy's front page recently.


Sunday, May 16, 2010

Collaborations Part II


In my previous post, I spoke a bit about different types of collaborations.  What grabbed my immediate attention were examples of the same artwork represented by two different sellers working independently.  This collection represents the best of what I found on Etsy. 

Print Art Transformed
There are many, many examples of paintings, photography and other print artwork being transformed and reproduced into another medium.  Examples include greeting cards, jewelry, and stickers to name a few.  Oftentimes the artist completes this transformation on their own, like this example from Michigan artist, Kandy's shop, BitOWhimsey:

Here, her original mixed media painting is offered as a one of kind painting, print, print mounted on wood,  jewelry pendant and note cards (not pictured).  Kandy maintains complete control over her artwork while offering the buyer multiple price points for enjoying her paintings.  

So what makes for a successful collaboration?  In the collections above, the first two rows are artists who have partnered with another artist to create accessories of their original paintings/prints.  A quick trip to their shops will show how successful that collaboration has been for both artists.

Cat Ivins has two distinctive and highly successful shops on Etsy, Polarity and Uncorked.  Cat's magnetic pendants, made from recycled car parts, are simply gorgeous.  She's successfully partnered with several artists to showcase their original artwork in these pendants.  Dilkabear's artwork is shown in this example.  Dilkabear offers prints, art cards as well as original paintings in her shop.  Her artwork is beautiful rendered in Cat's pendants and this collaboration (and resultant cross promotion) has worked well for both artists.

Yaelfran is a graphic artist whose prints are also offered in a  Polarity locket.  Yaelfran also offers sticker books featuring the artwork of several Etsy artists.  An ingenious way to decorate a page with your favorite artwork such as Geninne's Love Bird print.  Each sticker book contains the work of several artisans.  Yaelfran also offers you a chance to participate in a collaboration.  She offers coloring pages of her graphic art to encourage your inner artist.

The next two artists also feature pendants in their shops and the origin artwork, again, is perfectly showcased in the chosen design.  Heart Works by Lori's elegant lockets pair quite nicely with Irene Suchocki's delicate butterfly photograph (yep that's not a typo, it's a photograph).    In contrast, I couldn't envision a better setting for Rustic Goth's moody yet whimsical, paintings than this copper stained glass pendant by Enchanted Glass

Two artists on the last rows also had their print artwork transformed into another media.  In the first, House of Six Cats takes, in this example, Eyeshoot's photography and makes coasters that can also also be used as backsplash tiles.  Tea Party Revolution, however, offers you a different opportunity to collaborate with The Loli Shop by offering a cross stitch pattern for her prints that you can stitch and recreate the original (or use your own color scheme to create something new).

My last two examples in this series use the original artwork as inspiration or as a foundation for their own design.   Artmind provides the ceramic pieces Lilarubyking uses in her jewelry.  It's a fabulous collaboration and you can easily see the artists sharing a studio or gallery (although they live in two different countries).  And last, but definitely the inspiration for this series, is Loran Scruggs' collaboration with OopsthatsArt using their toys as a foundation for her own creation.  It's a brilliant collaboration and illustrates what two artists can accomplish when they combine their talents.  Although they work separately, their creations are uniquely linked.  

You can see more of these artists and their collaborations by clicking on their names in this article or on the title at the beginning of this article.  I encourage you to look for your own collaborations, big and small, they are inspirational.  This series has left me with many questions; how did these collaborations start, how do the choose their partner, and many more.  I'll cycle back and speak with a few artists to help answer these questions and will cycle back to this series.

In the meantime, my next article will focus on my collaboration with Somewhathip and a sneak peek at a couple planned for the future.

Tuesday, May 11, 2010

Collaborations Part 1

According to Wikipedia, collaboration is a recursive process where two or more people or organizations work together in an intersection of common goals.  That's a fairly limited definition, but it serves as a good introduction to this series.  Back in February, I did a spotlight article on Loran Scruggs during which I discovered that her toy animals started from the wooden toy animals sold by Oopsthatsart.  I was instantly smitten (maybe a bit obsessed) by the idea.  Two separate shops, each selling a product, but one had it's origins with the other.  I went on a mad quest through Etsy looking for other examples.  I even posted in the forums, which I never do, but received no response.  Fortunately, a search led to a couple of shops and a query (i.e. nosey questions) resulted in a few more.  My collection was complete and I titled it That Was Then, This is Now (clever aren't I).  That wasn't the end of my obsession; my mind was brimming with ideas.  I vowed to make at least one of those ideas a reality before starting this blog series and I'm happy to say I finished my first piece last week and I'm very pleased with the result.  


Before introducing  That Was Then, This is Now, I'd like to briefly highlight a couple other collaborative efforts.  When I started my bottle cap art series, a lovely artist name Anne Huskey discovered my blog and left a comment and I went on a happy blog hop.  When I joined Anne's merry blog group, she was working on a joint commission with her friend Tristan to create a stole for a young minister.  It was an amazing endeavor, two artists crossing the miles to create a stunning piece of wearable art.   The picture to the left is a Bargello quilt created by Tristan.  Anne describes the process (sometimes scary, mostly fun) of converting this work of art into a stole. 


This is Anne's work in progress.  (Please note that I had Anne's permission to post these pictures for this article.  Please do not repost these pictures without her permission) I won't spoil Anne and Tristan's big reveal, I let you go on a blog walk of your own.  They posted about this process January and February of 2010 and the picture of the young man wearing their creation is worth the journey and hunt through their archives.

Types of Collaboration
I choose to focus my upcoming article on artwork that stood on it's on in each artist's shop.  However, they're are many, many forms of collaboration, some with direct input from both artists, some indirect, and many with a tenuous connection at most.

Supplier to Artist -- This is, perhaps, the most common collaboration and one that you might not consider.  However, great suppliers are very much in tune with the artist community, continually creating products that help the artist enhance their work.  There are many examples of suppliers and artists working together to create new tools and products to fulfill the artist's vision.  

Art Supplier to Artist -- I wasn't sure how to title this collaboration but anyone who has a great relationship with a lampwork glass artist will know what I mean.  Marsha partnered with Hannah to create this lovely chapeau for Convergence II.  Hannah's orchid cannot be called a "supply" it just doesn't fit.  It's a work of art that beaders around the world covet, collect, horde, and sometimes use in their fabulous creations like Marsha did here.  I encourage you to visit Marsha's blog for more on this collaboration, it will literally bring you to tears.

Artist to Artist -- You'll find many examples of artwork in this category.  Marsh/Hannah's and Anne/Tristen's efforts fall into this category as well.  In this type of collaboration each person works on the end piece either separately or together (e.g. book illustrators with authors).  Each artist brings a unique skill to the creation.  I was fortunate to find a teammate whose work touched all of these categories and shows the progression of artwork.


In this example (disclaimer, the stones are different, these have sold as fast as they are made) LostSierra's lovely cabochon is transformed into a brooch by Glimmerstone, who in turn, provides beaded cabochons to MoreOutoftheOrdinary who uses them on her fabulous bags.  A full cycle of artwork awaits the new owner of these bags.

Of course there are many other examples and I encourage you to look for them, some are apparent and some are hidden but it's worth really looking at what goes into the artwork you see.  For me, I'm anxious to get to the meat of what started me on this journey, but alas, that will await my next posting.  I'll give my poor suffering readers a chance to digest this article and peruse the blogs I recommended.  It will be worth the wait (and blog hop), I promise you.

Blogs in this Article


Thursday, May 6, 2010


The winners of the Use the MUSE IV contest have been posted and you are in for a visual overload of beauty and creativity.  It never ceases to fill me with wonder at what occurs when you hand over a pile of beads to different artists.  I'm honored to have my creation included with these other incredible designs and I encourage you to look at every entry.  All of us have been waiting for the reveal and we were not disappointed.  Win or not, we all walk away with a great design and pride in our creation.  I have a very difficult time taking good pictures, but I particularly like the one above...makes a great ad doesn't it?

For my piece, I kept to my current emphasis on asymmetry and versatility making two separate neck straps that can also be worn as bracelets.  The picture above shows one of those straps in the foreground with the other strap in the background.  We have to keep the muse portion of the necklace secret until today, so (drum roll please), here's the necklace in it's entirety:


I enhanced the center piece by stamping it with a clear ink and rubbing in copper mica powder.  The powder was then sealed with four layers of matte artist sealant.  For the next challenge (yes I would definitely do this again), I'll take progression shots.  The center piece went through at least 5 different designs before I settled upon this one (and not a picture of anything but the mess left over).  It can be nerve wracking to start from scratch when you are under a time limit but the results are so worth it.


Please visit Scarlett's site to learn more about this event and to see all of the entries:


Sponsors:
Scarlett Lanson, The Beader's Muse
ArtBeads

Judges:
Marcia Decoster
Sherry Serafini
Cynthia Thorton
Lorelei Eurto 

To Purchase:
Christine's Beadworks