Sunday, May 29, 2011

Signing Your Artwork

It's important for an artist to sign his/her creations.  The artist signature or mark identifies it for all time and is often the final step in the creative process.  Something about applying that signature or mark closes a creative verse and leaves a sense of well being with the artist.  Jewelry artists have struggled to find a way to apply their mark to the artwork.  For metal artists that often involves a stamp that is hammered into their piece or attached as a separate tag.

Bead woven jewelry still does not easily lend itself to an artist's mark and again most of this work is left unsigned or tags are attached that don't often remain with the work.  Why should you care?  Ultimately the mark is there for the future.  Beadwork encompasses a huge body of work that has lasted for centuries and has had historical significance. Time will tell if patterns emerge and whether we can trace an artist's growth and influences through the years.  At the very least, your mark will be important to your buyers and/or your family for future generations.

Bead embroidery artists have learned from quilters and embroidery artists and many have begun finding small ways to mark their creations.  Since most of this type of work has a fabric backing of some sort, there are places the artist can write or embroider their initials.  It's this type of beadwork signature I'm currently exploring.  In this post I concentrate on my first steps in branding my designs.

Cat Ivins hosts a series of giveaways on her blog Olivebites.  It was there that I discovered Bullfrog Laserworks, and owner Roberto Sand.  He was giving away a custom stamp, so off to his shop I went.  I was astounded at what I saw.  I had been looking for awhile at having a custom stamp made for cards and packaging, and Roberto's are not only functional, they are beautiful.


These well made stamps have wooden handles engraved to match your design and can be made in practically any size and shape you need.  I ordered two stamps.  The larger one will serve as my Thank You on boxes and cards but I can also cover the words and just stamp the larger logo when needed.  The smaller logo was purchased with the intent to mark my ultra-suede, metal work, and the tops of plain bottlecaps to use in packaging.

These stamps are wonderful, but they weren't the most amazing item I found in his shop.  The second item is still in the prototype stage, but we're getting close.  Roberto has wooden tags he initially designed as wedding favors.  The slots in these tags caught my eye because I had been looking for slotted buttons (also called ribbon slides) to use on my laced back cuffs.


Because of the small size of the button (7/8") the slots are not centered to allow room for the text.  Roberto is sending me a sample so I can see if it rests properly on the cuff, if it doesn't we'll go back to using two holes for the ultrasuede to hook through.  I'll be able to color these buttons and perhaps put artwork on the reverse side.  I'm looking forward to playing with them and seeing where else they can be used and how I can alter them to coordinate with my design.

But wait, there's more!  As excited as I was about these discoveries, I was nearly jumping out of my chair when I saw his listing for 50 faux suede labels custom engraved!  We began a long exploratory journey into faux suede while I considered the most practical use of these amazing labels.  I knew it would be too expensive for me to have multiple shapes cut, so I settled on a large circle with my logo at approximately 25mm in the middle.  This would fit the majority of the cabochon pendants I make.  The faux suede Roberto offers in his shop is not ultrasuede, it's a polyester blend that frays.  This is not the end of the world, when the laser cuts out your shape it seals the edges.  For me, though, that would require pieces to match the size of all my cabochons, I wanted more flexibility.  I asked if I could send him some ultrasuede to use and was delighted when he agreed.


We were both thrilled with the results although I did discover that light to medium colors work best.  As you can see, the logo did not show up well on the black and I loved the tone on tone result on the Orange ultra suede.


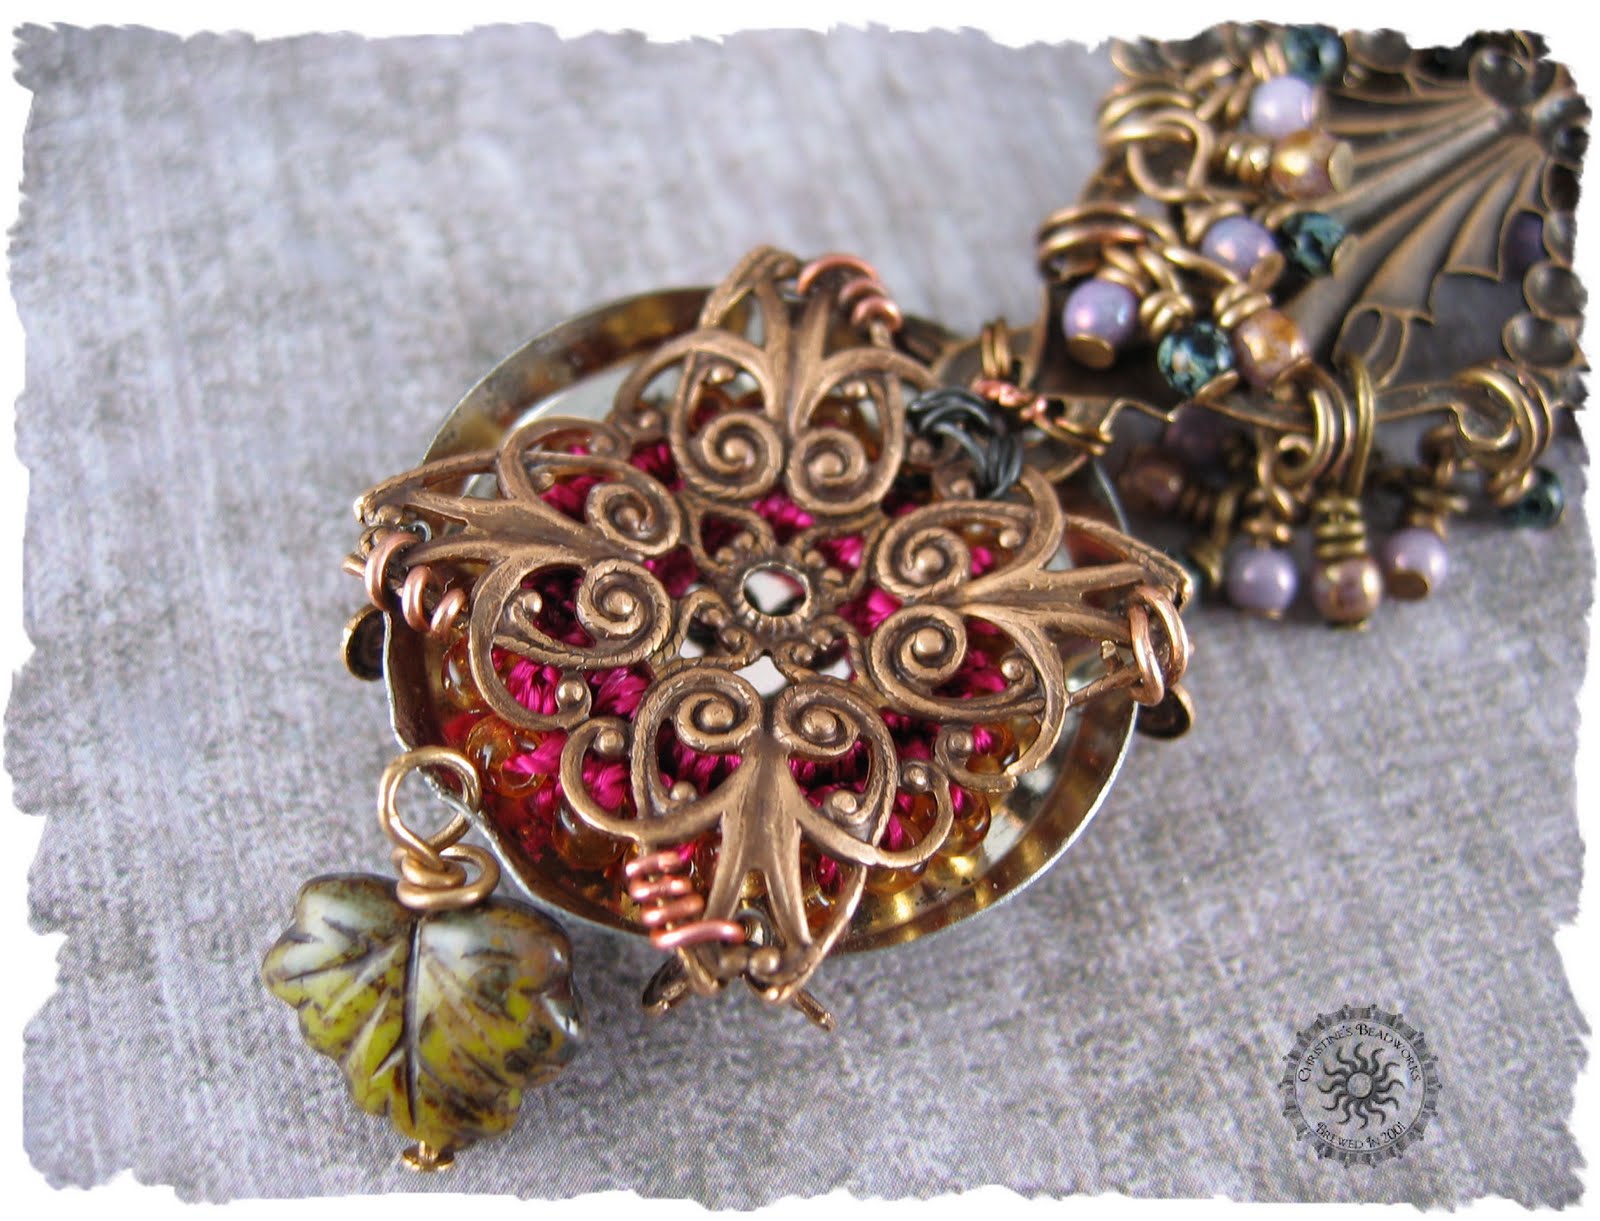
I quickly worked up a couple of Izze pendants and couldn't be happier with the look.  They add a professional touch while also keeping to the whimsy I like in my beaded work.  I'm looking forward to incorporating the stamps on my metalwork and anticipate a more industrial feel if what I envision works out as planned. 

So now what to do for my cuffs?  Since these are made in various widths, it just wasn't practical to laser engrave them.  My first experiment was with heat embossing.  I was at one time addicted to HGTV.  The first step to recovery is admitting you have a problem.  My realization came when my daughter (then only 2) exclaimed "it's Joan" when the host of one of my favorite shows came on the air.  I learned about heat embossing velvet from Carol Duvall a longtime host of all things crafts.  I thought I'd try to see if it worked on ultrasuede.  It will be hard to see in this picture, but it works amazingly well.  I set the iron at the "wool" setting, placed the stamp image side up and layered the ultrasuede on top.  I held the iron on the ultrasuede for 10-20 seconds, pressing firmly.  I lifted carefully and repeated until I could begin to see the indentation of the stamp.
It worked beautifully.  It's much more subtle than the laser engraving, but it still marks effectively.  Unfortunately, I did not get the same results with my new stamps.  The handles made it hard to get a firm press, I'd have to have them mounted on a flat wood block instead.  But the biggest reason is the detail.  My logo is too detailed for this method.  You need a stamp with deeper impressions, something to consider when you have your stamp cut.

My last experiment for this post was using the stamps and Staz-on ink.  The image to the left is the larger logo and the one on the right is the smaller one.  Both work well and this is the method I'll use for my cuffs.  With the smaller stamp, I'll need to press very firmly to work the ink into the grain of the ultrasuede.  I did these quickly and got good results, taking time and experimenting with ink colors will yield even better results. 
I like the boldness of the laser cut images, but these are a great alternative.

Roberto opened his etsy shop in 2008 and has grown quite successfully due to his unique product offerings, great prices and flexible customer service.  He has targeted the bridal market in the past, perhaps now the bead market will be a new venture for him as well.  You can find more in his etsy shop:  http://www.RobertoSand.etsy.com

Wednesday, May 11, 2011

What's Old is New Again - ArtBeads Blogging Project


A Comedy in Three Acts
Act I
ArtBead's blog theme, What's Old is New Again, immediately sent my thoughts to my coveted stash of champagne caps.  These were sent to me all the way from Belgium by my friend Sigrid.  Selecting materials is almost as much fun as working on the project.  I've literally spent all day browsing the shop, oohing and aahing at all the possibilities until I've narrowed my selection.  Keep in mind, at this stage I only have a rough notion of theme, the design often doesn't evolve until I have the materials in hand.  This can create challenges when something doesn't work, but that's part of the fun.

I selected materials that reminded me of vineyards, grapes, and imagined sipping on a mimosa while shopping (alas no champagne in the house to make an actual mimosa).  I wanted to try some of Artbead's new Kabela filigree pieces so that's where I began my selection.

From My Stash 

Although title Saint Andrews Fire, this awesome link reminded me of Demetrius, god of wine.  I select two of these beauties and intend to put one on each side of the focal piece to be the major component of the necklace.  I also selected one foot of chain and leaf hook and eye closure to complete the neck piece.

I interrupt this design for a story....a funny thing happened on the way to the pre-school.  One day a friend asked me to pick up her son from pre-school.  I was happy to help and my daughter and I drove off and arrived at the school with only a little confusion (mainly which door do we go in).  With the children secured in the back seat, I pulled out of the lot and proceeded to turn the wrong way.  I got about a 1/2 mile before realizing I wasn't heading towards home.  My daughter pats her friend on the arm and said "don't worry, mommy always gets lost, daddy never gets lost.  Daddy doesn't like to turn around, but Mommy always has to turn around."  True story, I kid you not!

Act II

You can see from the picture above, these links were not going to work as planned.  My directionally challenged brain forgot to take into consideration that I'd need a mirror image of the link to be able to place one on both sides of the focal as planned.  This mistake totally messed up the design. I toyed with using one link for an asymmetrical but I didn't have enough chain to complete the neck piece.  Also a link of this size needed a counterbalance on the opposite side.  

In the meantime, I'd noticed that the hook end of the clasp was missing.  Duchess Erickson from Artbeads could not have been more accommodating.  I've always had excellent service from Artbeads and it's one of the many reasons I frequently shop with them.  Duchess offered to exchange the clasp and links so that I could rework my design.  But I love nothing more than challenge and I just couldn't ask her to go through the trouble.  I didn't really have a concrete design, just a rough idea and oftentimes a problem leads to something better than what I envisioned.  Plus I loved these St. Andrew's links so off they went to my little box of pits and pieces from these blog designs.  I already have a couple ideas in mind for them.  And, lets not forget, there was that very cute story about my directional impairment (I'm missing the sense of direction gene, I'm sure).  Despite my protest not to go to any trouble, Duchess sent me a replacement clasp as soon as it was available (these components are provided to me free as part of the blogging program so this was a very nice thing).

I began working on a revised design and pulled the following out of my stash.  

All of these components were purchased from Artbeads for another project that I hadn't yet completed.  I had purchased the filigree with no project in mind, just to play with molding it around a cabochon.  It fit the champagne cap perfectly and a bit of wire was all it took to add it the Vino filigree center piece.  The edges molded perfectly into four grooves along the side of the cap (where the cage holds to cap to the champagne bottle).  The only regret is the filigree is so pretty its a shame only a little bit shows on the front.

I love these antique brass chains.  They come in a multitude of styles and I attached one long chain to allow me to place it over my head while I worked on the focal piece.  I need to see how it laid while on to make sure I was getting the components placed correctly.

ACT III

I just happened to take the emerging necklace along with me to a family Easter dinner celebration.  My niece Brittany asked if she could put it on.  As she was admiring the chains, I told her that I planned to put a clasp in the back and shorten the length.  "Why" was her response, "I love long necklaces."  "Can I have it when you're finished?"  Thus, began the third evolution of my design and Brittany's Choice was born.  Had I used the clasp, shown to the left, I probably would have shortened the neckpiece and the  chains dangling from the focal piece.  Brittany loved it the way it was, and I plan to give it to her when we visit again.  I now have a gorgeous clasp to use with my other project (a Full Sail bottle cap design) and with the St. Andrew's links, renamed Demetrius, perhaps soon to be renamed Poseiden.  

Disclosure: The above mentioned beads from Artbeads.com were kindly provided free-of-charge by Artbeads.com, within the frames of Artbeads.com blogging program. The author of this blog has not received any payment from above-mentioned company. The post above represents only personal opinion of the blog author.  You can find additional participating artists and their blogs on Artbeads' facebook page.